15 August 2013

Android Action Bar Compat


Action Bar Compat is an Android tool released by Google at I/O 2013.
http://android-developers.blogspot.ca/2013/08/actionbarcompat-and-io-2013-app-source.html

If you add a standard action bar to your Android project, you're forced to upgrade your minimum SDK version to 3.0, (API level 11 Honeycomb). This was when Google added the action bar. However if you want to support older versions of Android in your app then you can now use Compat. This enables you to drop back to Android 2.1 Eclair (API level 7).

Figuring out Action Bar Compat is not the easiest of tasks and requires quite a few steps.


Setup Support Library
http://developer.android.com/tools/support-library/setup.html

Action Bar Compat runs off a separate library that you need to install in your eclipse / studio workspace. Follow the steps in the above link carefully. You'll want to use the drop down "Adding libraries with resources" and follow those instructions. Once you're done you should have a new project named android-support-v7-appcompat in the workspace with no errors.
I had to modify my project.properties file to use the latest sdk:
target=android-18

Your Project

Now you can obviously create a new project or use an existing one. You'll want to make sure you right click on your project, click properties, click Android and then verify / change the following things:

  • You need to add the android-support-v7-appcompat project as a library.
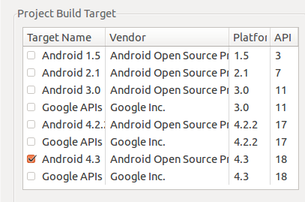
  • You need to make sure the project build target is the same for your project as it is for android-support-v7-appcompat. This is currently Android 4.3.


Now you can start changing the contents of the project. First the res/menu/menu.xml file has a couple of small changes:

  • The XML namespace becomes:
    <menu xmlns:android="http://schemas.android.com/apk/res/android"
        xmlns:support="http://schemas.android.com/apk/res-auto" >
  • The item attribute android:showAsAction="ifRoom|withText" becomes support:showAsAction="ifRoom"
Next the Manifest.xml.

  • Change the application theme, from this:
    • android:theme="@style/AppTheme"
             to
    • android:theme="@style/Theme.AppCompat"
Now open up your MainActivity.java file and we need to change a few things in here:

  • Change the extends to use ActionBarActivity
    • public class ... extends Activity
            becomes
    • public class ... extends ActionBarActivity
  • Replace any onCreateOptionsMenu you may have with a new one:
    @Override
    public boolean onCreateOptionsMenu(Menu menu) {
        // Inflate our menu from the resources by using the menu inflater.
        getMenuInflater().inflate(R.menu.main, menu);

        return true;
    } 
  • The onOptionsItemSelected should be the same.
  • You'll also need to import the following class:
         import android.support.v7.app.ActionBarActivity;
    But head Google's warning:


Caution: Be certain you import the ActionBar class (and related APIs) from the appropriate package:
  • If supporting API levels lower than 11:
    import android.support.v7.app.ActionBar
  • If supporting only API level 11 and higher:
    import android.app.ActionBar

That's about it, you should be ready to cook.

This is Android 2.1 (API Level 7) Without Action Bar Compat:


This is Android 2.1 (API Level 7) with Action Bar Compat:


Easy as that!
Here's my git repo for this example: https://github.com/jamessolo12/actionbarcompat You can find Google's sample here: /sdk/samples/android-18/ui/actionbarcompat/Basic

08 August 2013

Android, extending listView functinality


Android listViews are pretty useful and pretty simple. You have to get your head around some sort of adapter, but that's no huge issue.

However I've previously never bothered to find out how to get more than one column on a listView. Luckily this is much easier than I first thought. My example uses contentProvidors to setup the cursor, but I think this should work with DB stuff as well. Given a bit of hocus pocus.

I'm not going to go into the contentProvidor stuff here as it's a big subject and developer.android do a pretty good job:
http://developer.android.com/guide/topics/providers/content-provider-basics.html

First setup your activity_main.xml layout file:

<RelativeLayout xmlns:android="http://schemas.android.com/apk/res/android"
 xmlns:tools="http://schemas.android.com/tools"
 android:layout_width="match_parent"
 android:layout_height="match_parent">
 
 <ListView
  android:id="@+id/listView1"
  android:layout_width="wrap_content"
  android:layout_height="350dp"
  android:layout_alignParentBottom="true"
  android:layout_centerHorizontal="true" >
 </ListView>

</RelativeLayout>


Next add a new xml file to the res/layout folder (mine is named contacts_single.xml):

<?xml version="1.0" encoding="utf-8"?>
<LinearLayout xmlns:android="http://schemas.android.com/apk/res/android"
 android:layout_width="match_parent"
 android:layout_height="match_parent"
 android:orientation="horizontal" >

 <TextView
  android:id="@+id/name_entry"
  android:layout_width="100dp"
  android:layout_height="wrap_content" />
 
 <TextView
  android:id="@+id/number_entry"
  android:layout_width="100dp"
  android:layout_height="wrap_content" />

</LinearLayout>


Now move to the MainActivity or wherever your display function will be and you'll need something like this:

private void outputCursor(){
 // Defines a list of columns which we have defined in our cursor, and will be output to listView
 String[] mWordListColumns =
 {
  ContactsContract.Contacts._ID,
  ContactsContract.Contacts.DISPLAY_NAME_PRIMARY
  
 };

 // Defines a list of View IDs. These are IDs of textViews defined in a serperate layout file
 int[] mWordListItems = { R.id.name_entry, R.id.number_entry};

 // Creates a new SimpleCursorAdapter
 SimpleCursorAdapter mCursorAdapter = new SimpleCursorAdapter(
  getApplicationContext(),   // The application's Context object
  R.layout.contacts_single,   // A layout in XML for one row in the ListView
  mCursor,     // The result from the query
  mWordListColumns,    // A string array of column names in the cursor
  mWordListItems,     // An integer array of view IDs in the row layout
  0      // Flags (usually none are needed)
 );

 // Sets the adapter for the ListView
 ListView myListView = (ListView) findViewById(R.id.listView1);
 myListView.setAdapter(mCursorAdapter);
}

That should be all you need. Note the mWordListItems is passed into the adapter and the R.layout.contacts_single reference, telling the adapter to use these custom elements to display its contents. Then we get the ListView from the original activity and set the adapter. Simples!

06 August 2013

Android databse SqlLite and SQL Injection

SQL Injection is one of my favourite topics, sad but true. I think SQL injection is a very clever way of deceiving apps. This then encourages developers to be equally clever and thorough in their jobs to protect their data. I'm not for a moment endorsing such practices, what I'm saying is good developers should be aware of the possibilities.

In my last blog article I wrote a very brief introduction to SqlLite in Android.
http://webdeveloperpadawan.blogspot.ca/2013/07/android-app-using-database-sqllite.html

In this I deliberately left in some weak code so I could write a follow up on SQL injection. Look carefully at this string:

String DATABASE_ADD_USER  = "insert into "  + TABLE_NAME + " (muppetname) values (";

Obviously very susceptible to injection. If a user wrote

'; drop table theusers; --

We'd have a problem. Now fortunately database.execSQL() doesn't allow us to run more than one sql command in one execution. From developer.android.com:
Execute a single SQL statement that is NOT a SELECT or any other SQL statement that returns data.
In some ways this limits the potential of SQL injection, but we don't want to rely on that and it is horribly bad practice. Lets try it on our app and see what happens, paste the above (drop table statement) into the pop-up that appears when you click the btnFuzzy. You'll see your app crash and a SQLException in logCat.

In coldFusion we have a very useful tag called cfqueryparam: http://livedocs.adobe.com/coldfusion/8/htmldocs/help.html?content=Tags_p-q_18.html This simple tag gives us basic protection from injection and even allows us to specify the datatype. Although we should always clean our user input anyway :) Android has something very similar, allowing us to insert data using database.insert.

All we have to do is slightly ammend our insert user function:

 public void addNewUserProperly(SQLiteDatabase database, String name){
     ContentValues values = new ContentValues();
     values.put("muppetname", name);
     database.insert(TABLE_NAME, null, values);
 }

Now you'll see we've hardly changed anything, we use contentValues to store a set of values, the column name and the value. Then we insert that with database.insert. Super simple. If we re-run this and try our SQL injection trick, no more critical error :)

Hope this is of some use.